This is an update to the installation tutorial I’ve already wrote: Run JavaScript on your ESP8266 using Espruino firmware
For this installation I’m using a D1 mini board which is a “wrapper” for the ESP8266 (ESP-12) board.
Flash the Espruino firmware
The first step is to flash the Espruino firmware into the ESP board. You can find a tutorial in the Espruino site. In this article I’m putting a short list of instructions ready to use.
Install the ESP tools with the following command:
pip install esptool
The ESP tools are a set of Python scripts necessary to flash a firmware in the ESP board.
We need now the last version of the Espruino firmware, you can get it from the download page of the Espruino site. The zip file will contain the Espruino firmware also for the ESP8266 board.
We are ready to flash our board. The following instruction are for a ESP-12 board connected to the /dev/ttyUSB0 port. Please refer to the original tutorial for a different version of the ESP board. First move to the folder where you have unzipped the firmware.
cd espruino_1v93_esp8266_4mb
esptool.py --port /dev/ttyUSB0 --baud 115200 \
  write_flash --flash_freq 80m --flash_mode qio --flash_size 32m \
  0x0000 "boot_v1.5.bin" 0x1000 espruino_esp8266_user1.bin \
  0x3FC000 esp_init_data_default.bin 0x3FE000 blank.bin
The blue led in the board will start blinking and you will see the following output in console:
WARNING: Flash size arguments in megabits like '32m' are deprecated.
Please use the equivalent size '4MB'.
Megabit arguments may be removed in a future release.
esptool.py v2.0.1
Connecting....
Detecting chip type... ESP8266
Chip is ESP8266
Uploading stub...
Running stub...
Stub running...
Configuring flash size...
Flash params set to 0x004f
Compressed 3856 bytes to 2763...
Wrote 3856 bytes (2763 compressed) at 0x00000000 in 0.2 seconds (effective 124.0 kbit/s)...
Hash of data verified.
Compressed 479796 bytes to 336471...
Wrote 479796 bytes (336471 compressed) at 0x00001000 in 29.7 seconds (effective 129.3 kbit/s)...
Hash of data verified.
Compressed 128 bytes to 75...
Wrote 128 bytes (75 compressed) at 0x003fc000 in 0.0 seconds (effective 86.3 kbit/s)...
Hash of data verified.
Compressed 4096 bytes to 26...
Wrote 4096 bytes (26 compressed) at 0x003fe000 in 0.0 seconds (effective 4737.3 kbit/s)...
Hash of data verified.

Leaving...
Hard resetting...
If you’re having problems finding the correct device path in Linux:
- first check that you’re using an USB data cable. The first time I’ve tried I was getting crazy because I was using a simple power USB cable.
- second try this console command to print the system events when the USB cable is plugged:When you plug the cable you will get something like this:
watch -n 0.1 "dmesg | tail -n $((LINES-6))"[ 5597.132098] usb 6-1: new full-speed USB device number 11 using uhci_hcd [ 5597.298148] usb 6-1: New USB device found, idVendor=10c4, idProduct=ea60 [ 5597.298156] usb 6-1: New USB device strings: Mfr=1, Product=2, SerialNumber=3 [ 5597.298160] usb 6-1: Product: CP2102 USB to UART Bridge Controller [ 5597.298163] usb 6-1: Manufacturer: Silicon Labs [ 5597.298165] usb 6-1: SerialNumber: 0001 [ 5597.304121] cp210x 6-1:1.0: cp210x converter detected [ 5597.306173] usb 6-1: cp210x converter now attached to ttyUSB0
Ready to run
After the flash operation the board is ready to receive your JavaScript commands!
To send the commands you need to connect to the board using a serial connection (through the USB port). Under linux you can use the screen program:
screen /dev/ttyUSB0 115200
Now you can send JavaScript commands that will be interpreted and the output provided as response.
For example writing:
1+1
you will get:
=2
You can call functions, for example:
reset();
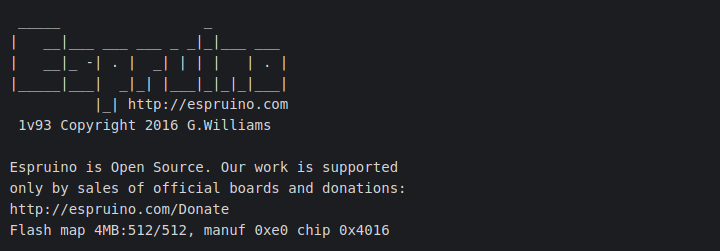
it will reset the board and print a boot message:
 _____                 _
|   __|___ ___ ___ _ _|_|___ ___
|   __|_ -| . |  _| | | |   | . |
|_____|___|  _|_| |___|_|_|_|___|
          |_| http://espruino.com
 1v93 Copyright 2016 G.Williams

Espruino is Open Source. Our work is supported
only by sales of official boards and donations:
http://espruino.com/Donate
Flash map 4MB:512/512, manuf 0xe0 chip 0x4016
If you want to exit from Screen press CTRL-A and then \.
Now you’re ready to write your JavaScript code and run it in a ESP8266 board, for example using the Espruino Web IDE.