Cesanta has developed a JavaScript engine, capable of run JavaScript code in the ESP8266 device and in other embedded devices. The JavaScript engine is provided with the Smart.js framework. The framework offers a set of APIs for files management, networking and WiFi management, SPI and I2C communication, GPIOs and Cloud services. The framework is distributed ready to flash under Windows and Mac. Here you can find a short guide.
In this article I will show how to build the framework under the Ubuntu’s like OS and flash your ESP8266-01 device with the latest Smart.js framework version.
Framework build
In order to build the Smart.js framework we need first to install Docker. A complete and updated set of instructions on how to install Docker can be found here. To make it short you can simply run this command in the console:
wget -qO- https://get.docker.com/ | sh
After the Docker installation is complete we checkout the framework code:
git clone https://github.com/cesanta/Smart.js.git
To build the framework move to the esp platform directory:
cd Smart.js/platforms/esp8266
and run the build process:
sh make.sh
The first time it will require a little bit because the tool has to download the docker images. Next builds will be really fast.
The three binary files composing our ESP firmware will be generated under the firmware folder. Now we need the tool to flash the ESP device.
Flash’n’Chips build
The Smart.js framework is provided with a tool for flashing our devices: Flash’n’Chips.
To build the tool first we need to install the required dependencies: Qt 5 and libftdi.
To install Qt 5 you can use the installer distributed by Qt here. It will install all the Qt tools under the specified folder. In the folder you will find the binary required to compile Flash’n’Chips. I suggest to add the bin folder to your PATH variable:
export PATH=Qt5.5.0/5.5/gcc_64/bin:$PATH
To install the libftdi library run:
sudo apt-get install libftdi-dev
Now we are ready to compile the Flash’n’Chips tool. Move to the source folder:
cd smart.js/flashnchips
And run first:
qmake
then:
make
In a bit the tool will be ready to be executed. Time to connect the ESP device to your computer.
Wiring
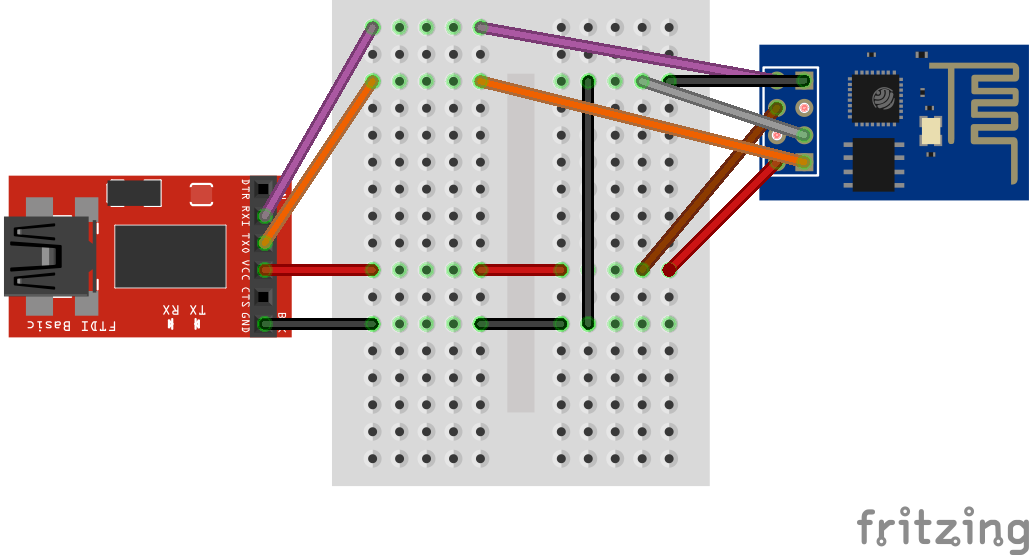
To connect my ESP 8266-01 I’m using a FT232 adapter. If you are using it remember to set it to 3v3.
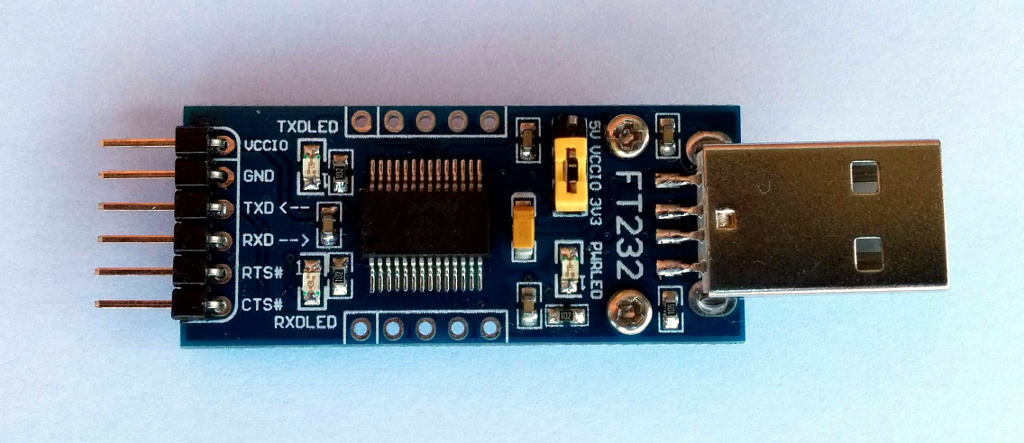
We connect the respective VCC and GND pins, same for RX and TX pins but inverting them. We need also to connect the ESP CH_PD to the VCC and, only for the flashing process, the ESP GPIO_0 to the GND.
We are now ready to flash the previously built firmware into the ESP device.
Flash the ESP
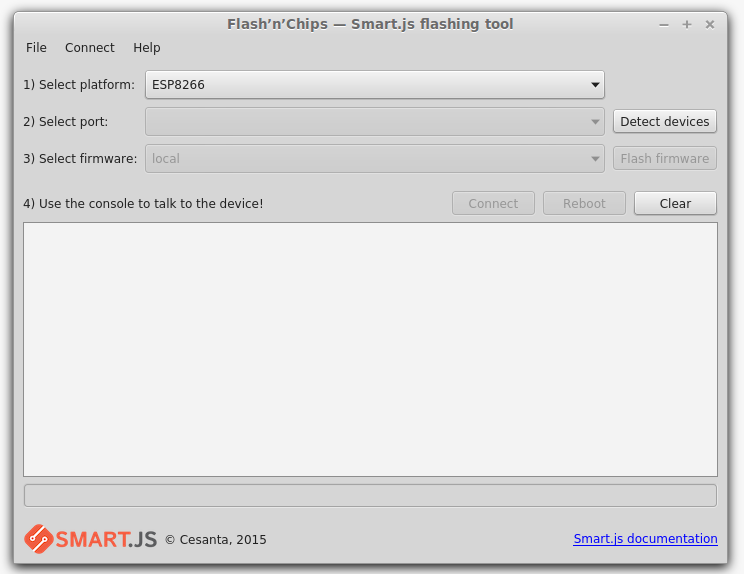
Connect the USB adapter and run the Flash’n’Chips tool using this command from the flashnchips folder (I had to use this parameters for some issues with my ESP board):
./flashnchips --overwrite-flash-fs --esp8266-flash-params 0x0000 --gui
The tool should show the “Flash firmware” button active.

If not press the “Detect devices” button and see if the adapter is recognized.
Press the “Flash firmware” button and the flash process will start. You can see the progress bar running and the current operation explained under it.
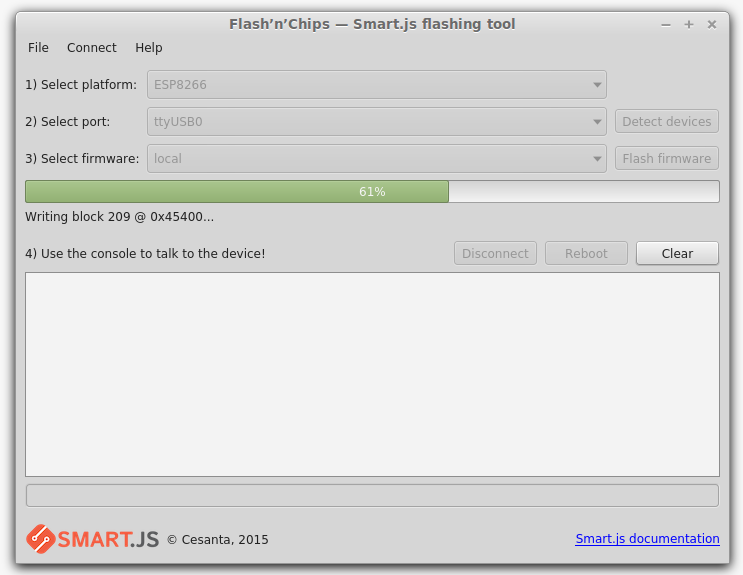
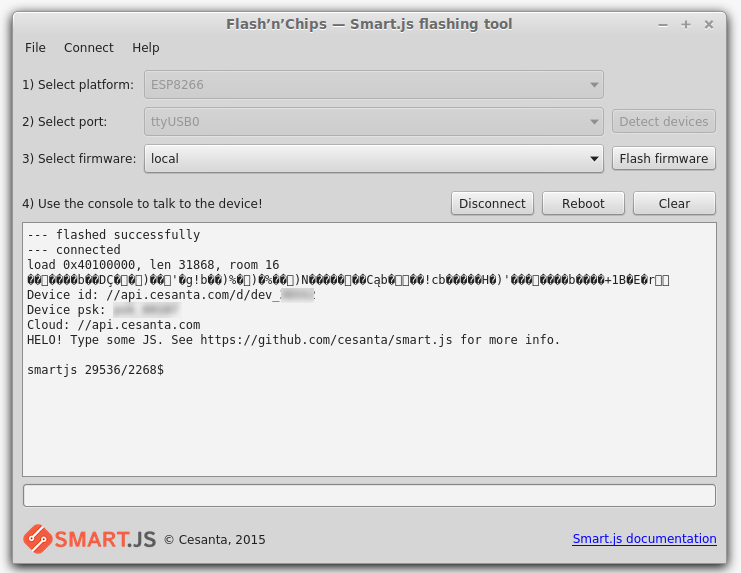
When the process is completed the communication console will be activated under the progress bar area. You will see some messages from the device.

Now we are ready to run some JavaScript commands in our ESP device.
Play with console
The Flash’n’Chips console has two areas, the first shows the device output, the second let us write commands to send to the device. The commands are snippets of JavaScript code that are executed on the device.
We can start writing a simple expression:
2+2
The device will calculate it and reply with the result:
smartjs 29176/2256$ 2+2
4
We can also use the framework’s APIs, for example we can list the files present on the device:
File.list('.');
It should output something like:
smartjs 29536/2268$ File.list('.')

["cloud.js","demo.js","clubby.js","MC24FC_test.js","MPL115A1.js","I2C.js","MC24FC.js","smart.js","user.js","sys_rts.js","MCP9808.js","MCP9808_test.js","gpio.js","sys_config.json"]
These are some of the JavaScript functions that our device can run. In the next article we will see how to run a simple program that reads values from a DHT11 sensor and publish them in a site.