In this post I will show you how to generate a navigable map of your family tree starting from an image of your tree. You can see an example of what you will obtain here.
The problem
One of my hobbies during the free time is genealogy. I like doing research on my family and as a result of such activity I’m building a family tree.
When you start your genealogical research the family tree is small and easily printable or visualizable in a common size monitor. Often you like to share the results of your hard work with other family members, maybe using a web site were to show your beautiful tree.
If you’re lucky you start “collecting” more and more individuals, as consequence, the family tree grows and become an huge tree (or sometime what I call a forest). Putting that enormous image of the family tree in a web page starts to be problematic. First, the browser will have some difficulties loading such a big image, if not, in some cases, it crashes. Then the navigating would not be so easy, especially if you want to have a general idea of the tree or zoom in into an individual details.
Here the idea of make the tree navigable like a map. In this post I will try to show you the necessary steps to obtain such navigable tree map.
NOTE: All the instructions are for Ubuntu like distributions.
The solution idea
Have you never used Google Maps or other similar sites? Those sites lets you navigate big maps of continents, countries or cities in the browser simply dragging it with the mouse pointer.
How they make it possible? To make it simple, they split the huge image map into small pieces, called tiles. When you navigate an area of the huge big map the browser simply download and visualizes only the tiles for that area. This make the browser loading only a small part of the map. You can notice this mechanism when your internet connection is slow and you move fast in the map, you will see that the map is loaded by pieces.
You can also zoom in and out to different altitudes, this is done visualizing pieces from different “versions” of the map, a version with more or less details.
We will try to use the same mechanism for our tree. We will use a software to generate this pieces and to generate a demo web page where navigate our tree.
Obtaining the huge tree
Let’s start obtaining our family tree. You can produce it using a genealogical software or by hand, if you are brave enough.
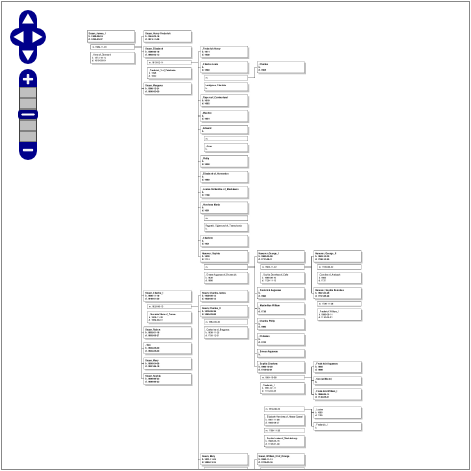
I prefer to use Gramps and his Descendant tree report. The report tool produces a family tree starting from the active individual. The report can be saved in different formats, but only SVG for image types. I like to use the PDF format and then convert it to image.
For the post I’ve used the Royal92 gedcom file, that as the site says “Features the Kings and Queens of Europe, including Great Britain.”. The report has been generated from the individual Stewart Matthew (I1507) and saved as PDF. In order to obtain a tree with his natural dimension and not stretched I’ve checked the Resize Page to Fit Tree Size checkbox in Size tab. You can download the generated file here.
Finally I’ve converted the file using the convert command from ImageMagick:
convert mytree.pdf mytree.jpeg
The conversion produced an image of 5635x32466 pixels. You can download the image here.
Tools installation
In order to generate the map we need GDAL. It “is a translator library for raster and vector geospatial data formats”.
To install GDAL you need to add the GIS PPA repository to your source repositories:
sudo add-apt-repository https://launchpad.net/~ubuntugis/+archive/ppa/
Then install GDAL bin and GDAL python support:
convert mytree.pdf mytree.jpeg
Now test if everything is installed running:
gdal2tiles.py --version
It will reply with the version installed.
Navigable map generation
Now we are ready to generate our navigable family tree. To do so, we will use gdal2tiles.py. The tool takes an images as input and generates an HTML page, with all the necessary scripts, and the image tiles to make our tree navigable.
First create a destination folder:
mkdir mytree
Then run the tool:
gdal2tiles.py -p raster tree.jpeg mytree
The execution will requires a little bit showing a progress like this:
Generating Base Tiles:
0...10...20...30...40...50...60...70...80...90...100 - done.
Generating Overview Tiles:
0...10...20...30...40...50...60...70...80...90...100 - done.
When it completes the generation, you can open the openlayers.html file create inside the mytree folder with the browser. You can navigate the map produced with the example family tree here.
You can tune the result with the tool options like the numbers of zoom level to produce or the resampling method. The produce map has a little border that appears when it is zoomed out, looks like the tool requires particular sizes for input image. More information here.
You can easily integrate the obtained map on your family site.
I hope you liked the proposed solution. Feel free to comment or add suggestion as post comment.